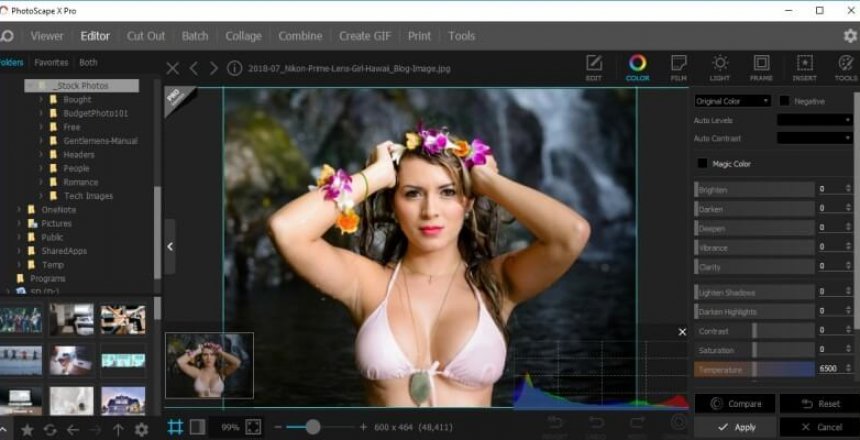
Recently, one of my friend’s Sarah George introduced me to an amazing free photo viewer and editor called PhotoScape. I had previously been using Paint.NET and IrfanView as my go to photo viewers and editors but there are some amazing features in PhotoScape that caught my eye.
PhotoScape X
One thing that is most powerful about PhotoScape X is that there are videos that demonstrate not only the effect of a tool, but demonstrate what to do on your own photos to get the same effect.
Photo viewer
PhotoScape has a powerful photo viewer that you can look at photos on your hard drive easily and hit i to inspect the information inside that photo easily. On some photos, the true date the photo was taken is recorded along with the camera used to take the photo, so if your photos got copied around a lot, the creation date can be changed by Windows, so it looks like your photos were created later than they were, the text inside the photo fixes that problem.
Photo editor
PhotoScape includes powerful editing features that you can expect from a photo editor similar to that of Adobe PhotoShop.
Cut Out
Cut out is a feature to remove the background from a photo, as well as create a mask so that you can make the part you wish stand out while the rest is in black and white, often called spot colour when one colour is chosen, but with the mask, you can have multiple colours.
Batch
One task you can perform to one image can be applied to multiple images. In Adobe, you’d use LightRoom to do this instead of PhotoShop, but in PhotoScape you do this in the same program.
Collage
Collage enables you to assemble your own photo collage using your own photos. You can choose a background and an effect for the photos you choose so they display in different ways.
By choosing the number of photos you wish to display, you can apply the appropriate effect for that number of photos.
Combine
With collage, you are designing a fancy layout for your photos but with combine, you can combine existing photos together. Perhaps you want to stack them on top of each other.
An example would be a brochure where you have a discount code as a separate image that you want to tack on the bottom. You can have the width size to the first photo or by a set width.
Create GIF
Drag different photos in and you can create an animated GIF easily. You can change the speed of animation and the transition effect between images.
The print feature allows you to lay out photos on a contact sheet, where they occupy cells on the sheet. You can choose what size these photos will be and how they occupy each cell.
You can also tile photos or print them on the page as one photo easily.
Tools
The tools section has three tools available:
Screen capture – You can capture the screen:
- Full screen – This captures everything on the screen.
- Window – This captures the program window you have open.
- Region – You can draw a region to capture on the screen.
- Timed Screen Capture – You can set a time for the screen to capture, great if you have to perform a sequence.
Pro version
While the free version is powerful, there are a lot of features that are extended in the pro version.
- 28 extra tools are enabled.
- 2,000+ stickers are available.
- You can apply hundreds of effects including nature like rain, snow,etc.
The pro version costs just £33.49.


