If you hear start-up sounds when you turn the computer on, but no picture, then it is probably something wrong with the screen or it’s wiring.
If the picture is faint, then it could be a back light issue or the wiring to the screen.
If you have a line or few down your screen, then you have a bad screen. This is caused by bad solder joints on the screen, it cannot be easily repaired, you need to replace the screen.
If you take an external monitor and connect it up and press the magic keys on the keyboard that switch the monitor into showing the desktop and it works, you have a problem with the screen (or it’s wiring)
If the fans whir but there is no sound and no output on the screen or monitor or that there is nothing when you try to turn it on, you have a power problem. Try disconnecting the battery and if that works, then it’s a battery issue. If it doesn’t, try replacing the power adapter, and if that fails then you have a component problem that will probably cost more to diagnose and repair than it would buying a new one.
Removing the bezel
The bezel is the plastic piece that hides the wires and screws and the unsightliness of the inside of the laptop screen. Older laptops held this together with screws that were often covered with rubber or plastic to hide those as well. In newer models, they simply use plastic clips around the outside.
Be careful as you prise these as they break too easily.
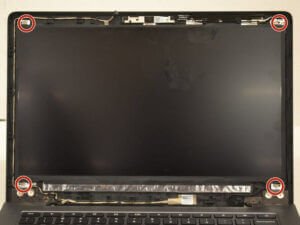
Remove the 4 screws around the screen
Screens are held in place by 4 screws that screw into inserts that are moulded into the plastic of the lid.
You may find other screws you need to remove at the bottom that serve part of the hinge mechanism.
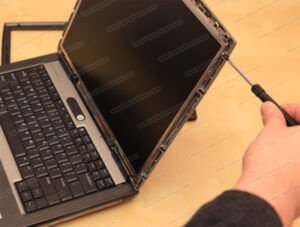
The idea is to be able to hinge the screen down so you can get to the connector at the back.
Check and reseat the connector
If the screen is blank or there is a faint image on the screen, then the connector may have got disconnected or partially disconnected, then reseat the connector.
If the back of the screen lights up, then the problem was with the connector. If you have a hot glue gun at hand, drip a tiny blob each side of the connector once it is in place, push it flat with your finger and although the glue is still hot, you can compress it so it doesn’t affect the laptop operation when you reassemble.
If this doesn’t fix the problem, but when you move the screen back and forth and the screen flickers, the problem is in the cable itself. The solution is best left to a professional, as every laptop manufacturer is different and some it is a simple case of lifting a piece of plastic and pulling out a connector to having to remove every possible screw and taking the laptop apart.
Replacing a bad screen
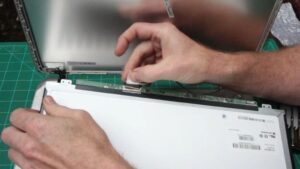
Start by disconnecting the connector.
Take a picture of the stickers on the back of the screen so you can order a replacement of exactly the same type, as manufacturers use different types in the same model sometimes, and buying the wrong one won’t connect to the laptop.
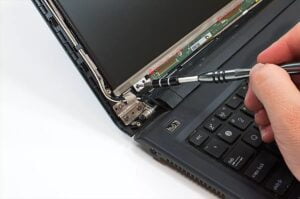
Turn the laptop so that one side faces you. You will see two screws that hold the screen panel to the metal hinge frame, remove these two screws.
Turn the laptop the other way and carefully remove the other two screws while holding the screen. If it’s cracked, you don’t want glass all over you. You can hold it at the top in an area that is not cracked while you do this if you want.
Once the screws are out, you can separate the screen from the laptop and set it aside. A quick google search will find a replacement screen online, often on ebay you can find a good deal on a new one that is local. They are all made in China anyway.
Reverse the process to reassemble
If you’ve replaced the screen, insert and tighten the screws that hold the panel into the hinge, it is best to start with one screw that is loosely screwed in in one corner, then rotate the laptop to put the screws in the other side, so you get the correct alignment.
Make sure the cable at the back is seated, glued in place if necessary (some manufacturers use tape, but the tape doesn’t always hold the connector in place)
Screw the metal hinge plate into the lid and then when all that is done, click the bezel back into place. You may need to use some force around the edges and the cracking noises are not for the faint of heart, but it is the only way to make sure they are all clipped in.
Older laptops
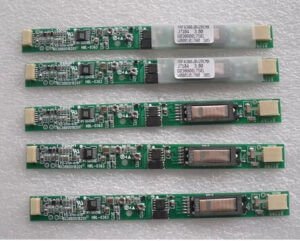
Modern laptops use an integrated connector that provides both the screen and LED back light. In older laptops that had LCD screens, a small board located below the screen called an inverter board would often fail. This board would more likely be the cause of a dark screen or seemingly no screen.
Thankfully, LED screens are far more common these days.
Wrapping up
Replacing a laptop screen is not a hard job, it’s like assembling flat pack furniture but without the instructions, the job becomes exponentially harder.
If you want something cool to do with the broken laptop screen, you can turn it into a light source for your zoom meetings. Matt from DIY Perks has videos on Youtube that show how to do this.