

This is a weird problem, certain MacBook Pros and probably some other Macs have a problem of performance degradation when upgraded to SSD from standard hard drives. You’d think it would be the other way around but the drives are too fast for the cables.
MacBook Pro 2011 and below
The MacBook Pro 2011 comes with a SATA II hard drive, whereas the MacBook Air comes with a proprietary SSD drive. It should be a simple task to upgrade a MacBook Pro hard drive to a SSD. Indeed it is physically, you just undo the screws, remove a spacer and lift out the drive and put the SSD in it’s place.

SATA cable
As a physical drive replacement ‘like for like’ will give you a working SSD in a MacBook Pro, you won’t get the performance of the SSD because it is faster than the SATA cable can deliver.
You have to replace the SATA cable in the MacBook Pro 2011 with the SATA cable from the MacBook Pro 2012 as they are the same connectors but the cable is upgraded for SATA III.
Luckily, ifixit has a kit that you can buy that lets you replace this cable. Save time and effort by buying one with the bracket. Otherwise, you have to peel the old LED drive light from the bracket and attach the LED drive light on the new cable to the bracket.
Apply some electrical tape to the SATA cable to hold it in place to prevent it rubbing against the aluminium case.
PRAM or NVRAM
Whenever hardware is changed on a Mac, it is always a good idea to reset the PRAM (Parameter RAM) PRAM is used by the Mac to store certain settings related to the computer when the power is switched off. The brightness of the screen, backlight settings and whether to sound the bong when it powers on is stored in there, along with which hard drive is the main drive.
In order to tell the Mac you have a new main drive, you reset the PRAM when you turn the computer on. Hold down Command and Option (alt) and PR. The machine will bong once, but keep holding these key and listen for 2 more bongs as the Mac attempts to restart each time.
SMC
In addition to the PRAM, the SMC or System Management Controller controls the power management of the Mac, so performance issues are likely to be cause by the SMC.
With the Mac turned off, hold down the left Shift, Control, Option and power button at the same time for 10 seconds.
Now you can turn on your Mac.
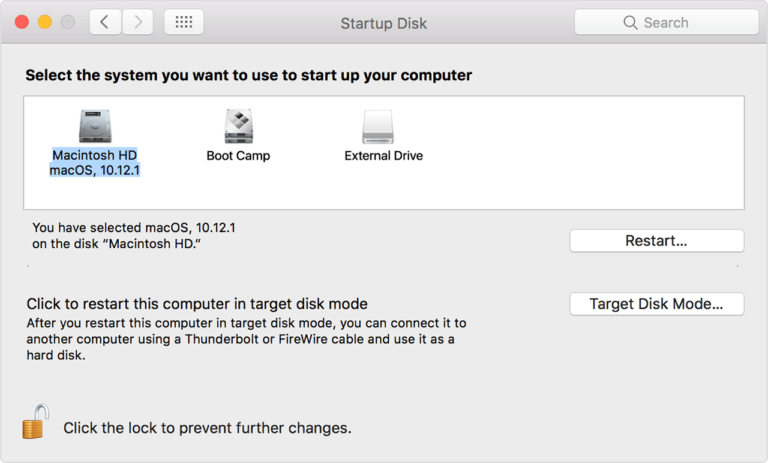
Startup Disk
The next step is to make sure the SSD is the Startup Disk. This applies only if you have cloned the operating system, as it will still think it is running on the older hard drive and look for it on startup. If you clean installed the OS, then it will know the SSD is the Startup Disk so you can skip this step.
On boot, you will notice the MacBook will take much longer to start than normal, you have to wait for the OS to stop looking for the old drive before it boots from the SSD.
From Apple menu, choose System Preferences then Startup Disk. Click to unlock and enter your password, then click on the SSD. This makes the SSD the Startup Disk for every startup. You can hold down the option key to switch during boot if you have more than one MacOS installed in different partitions or if you use BootCamp (Windows running on a Mac)
Target Disk Mode turns your Mac into an external hard drive that can be accessed from another Mac using a Thunderbolt 2 data cable (one that has a small D connector on both ends) or Thunderbolt 3 or 4 data cable with an adapter.
Firmware upgrade
Since the MacBook Pro 2011 has firmware that expects SATA 2 drives, this needs to be updated to support SATA 3 drives. This must be done while the MacBook is on mains power and must not be disturbed during firmware updating or the logic board is toast.
Apple’s EFI updater version 2.3 for MacBook Pro 2011 can be found here.
Other Apple firmware updates can be found here.
