
That “Storage space running out” message always arrives at the worst moment: you’re about to take a photo, install an update or save a video from a family chat.
The good news is you rarely need to delete anything you actually care about. Most of the space on a full Android phone is taken by duplicate photos, old downloads, app caches and apps you haven’t opened in months. Here’s how to find it and clear it safely.
Before you start: Android menus vary a little between phone makers. The steps below use Google Pixel / standard Android names, with Samsung Galaxy differences noted. If you can’t find a setting, tap the search bar at the top of Settings and type its name.
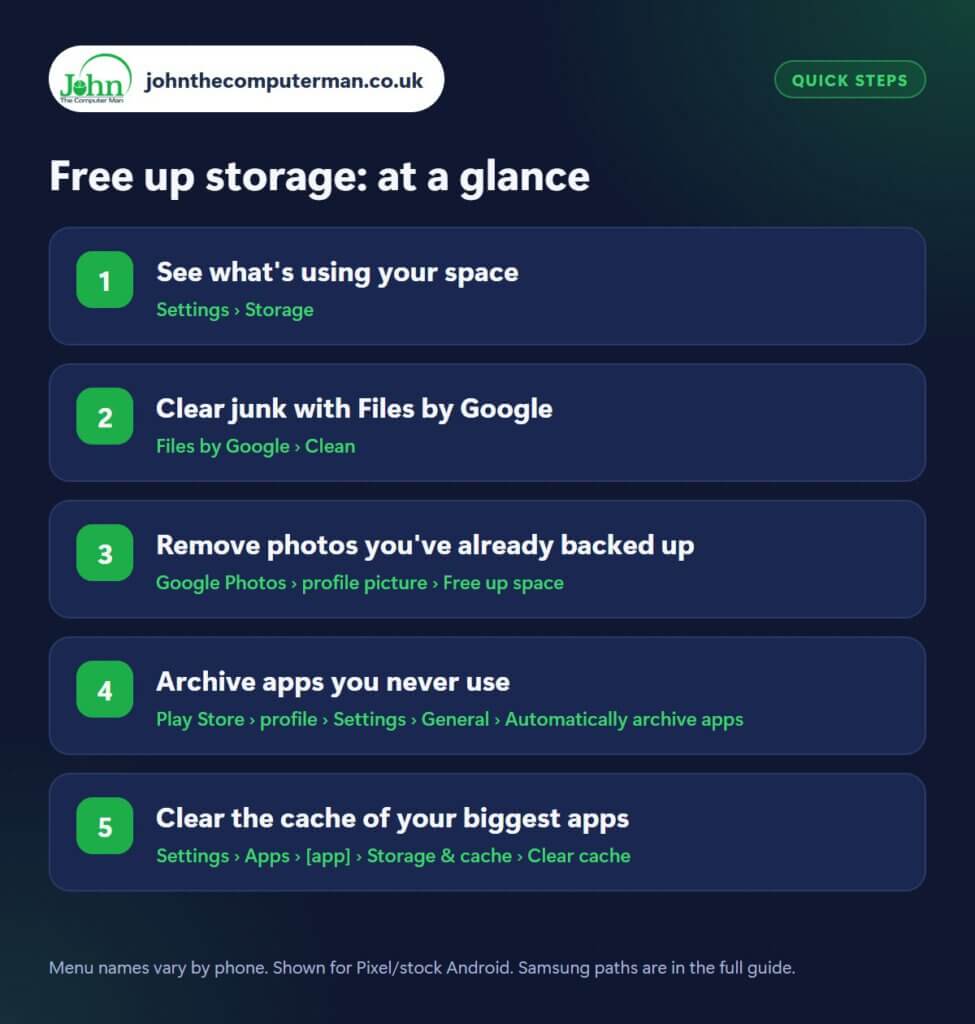
How to free up storage on Android
Step 1: See what’s using your space
Where: Settings › Storage
Samsung: Settings › Device care › Storage
Before deleting anything, find out where the space has gone. Open Settings › Storage (on Samsung: Settings › Device care › Storage). You’ll see a bar split into apps, images, videos, audio, documents and system files. Tap any category to see the biggest items first. Nine times out of ten, the answer is photos and videos, or one or two apps like WhatsApp that quietly store every photo and video you’ve ever been sent.
Step 2: Clear junk with Files by Google
Where: Files by Google › Clean
Files by Google is free, comes pre-installed on many phones, and is on the Play Store if yours doesn’t have it. Open it and tap Clean. It groups suggestions into cards: junk files, duplicate files, old screenshots, large files and downloaded files. Each card shows what it will remove before you confirm, so nothing disappears without you seeing it first. Junk files (temporary app files) are always safe to clear.
Step 3: Remove photos you’ve already backed up
Where: Google Photos › profile picture › Free up space
If Google Photos backup is on, your pictures are already stored in your Google account, so the copies on your phone are duplicates. Open Google Photos, tap your profile picture, then Free up space. It tells you how much you’ll get back and only removes items that have finished backing up. Your photos stay in Google Photos and you can still view and download them. Not using backup yet? See how to back up your Android phone first.
Step 4: Archive apps you never use
Where: Play Store › profile › Settings › General › Automatically archive apps
Archiving is the best thing to happen to Android storage in years. It removes most of an app but keeps your data, settings and sign-in, and the icon stays on your home screen with a small cloud badge. Tap it and the app comes straight back. Turn it on automatically in the Play Store › profile picture › Settings › General › Automatically archive apps. On newer Android versions you can also archive an app yourself from Settings › Apps › [app] › Archive. Apps you’ll never use again? Just uninstall them.
Step 5: Clear the cache of your biggest apps
Where: Settings › Apps › [app] › Storage & cache › Clear cache
Social media apps, browsers and streaming apps store temporary files (cache) to load faster, and some let it grow into several gigabytes. Go to Settings › Apps, pick a big app, then Storage & cache › Clear cache. It’s safe: the app just rebuilds what it needs. Be careful not to tap Clear storage (sometimes called Clear data). That resets the app and signs you out, and can delete things like offline downloads.
Pro tip
💡 WhatsApp is often the hidden storage hog. Go to WhatsApp › Settings › Storage and data › Manage storage to find and delete huge forwarded videos.
FAQ
Is it safe to clear cache on Android?
Yes. Cache is temporary data apps can rebuild. Clearing it won’t delete your photos, messages or logins. Just avoid ‘Clear storage’ or ‘Clear data’ unless you mean to reset the app.
What is ‘System’ storage and can I delete it?
System is Android itself plus temporary update files. You can’t delete it directly, but restarting after an update often shrinks it.
How much free space should I keep?
Try to keep at least 10–15% of your storage free. Phones slow down and updates can fail when storage is nearly full.
The bottom line
Start with the storage screen, then let Files by Google and Google Photos do the heavy lifting. Turn on automatic archiving and you’ll rarely see that “storage full” warning again.
Part of the android phone tutorials series on johnthecomputerman.co.uk. Follow @johnthecomputerman on Instagram for more Android tips. Steps were checked on current Android and Samsung One UI versions in September 2026; menu names can change with updates.
