
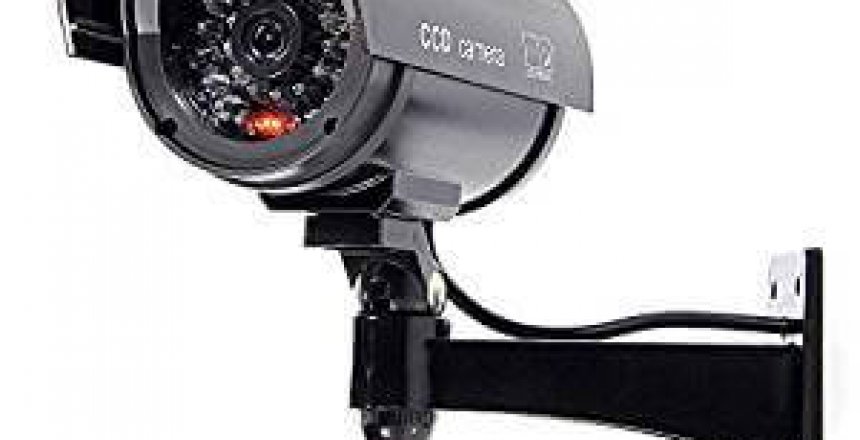
Home security can be expensive, although you can buy dummy cameras and make it look like you have security at your property, the cameras look fake and an opportunist can take advantage of that.
A good security camera can cost upwards of £100 each, then you need either a DVR (if the camera is digital) or an NVR (if you are using an IP camera) which may cost another £400. You could use Nest cameras, but you pay for the camera and then a monthly fee for the online storage.
Or, you can buy some off the shelf parts and build yourself your own outdoor security camera. If you want an indoor security setup, have a look at DIY Perks video on webcams and how to convert them into internal surveillance cameras.
What you need
First off you need to get some hardware:
- Dummy bullet camera, this will probably cost around £6 from Amazon
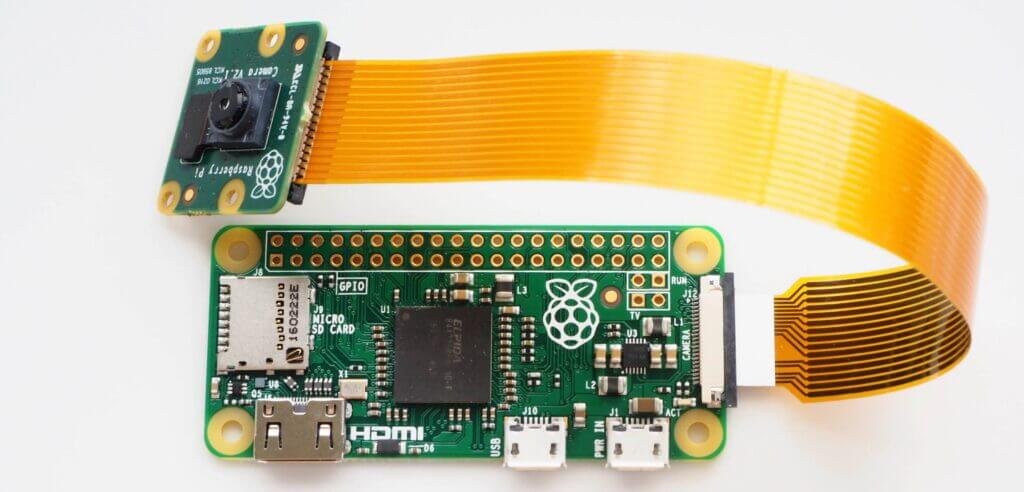
- Raspberry Pi Zero W, this can also be purchased online for about £10. Although the Pi Hut Essentials Kit is a better choice for the first Pi you buy as it comes with a micro USB to USB adapter and a Micro HDMI to HDMI adapter for setup.
- Raspberry Pi Zero W camera, these can be purchased for around £16 for the 5MP or £25 for the 8MP.
- A 32GB micro SD card for about £6.
- 10m micro USB cable for about £10.
- 5V USB power supply for about £5.
You may not need the last two items, depends on where the power point is and whether you have a spare USB plug available.
You will also need to download some software for the Raspberry Pi.
Software preparation
You will need to download some software called MotionEyeOS to your computer along with Etcher to write the disk image to the micro SD card.
Once the image has been written to the SD card, there will be a small area available for Windows to write files into, in this space (known to the Pi as /boot) you need to create a small file called wpa_supplicant.conf, the best program to create this is NotePad++ as you can change the EOL (End Of Line) characters to Unix.
You need to enter your router’s SSID (Your Wireless Name) and PSK (Wireless Key) into this file.
This file tells MotionEyeOS how to connect to your wireless network as the Raspberry Pi Zero W does not have a hard wired Ethernet interface. If you are using a Raspberry Pi 3 or 4, then these can be connected using Ethernet.

country=gb
update_config=1
ctrl_interface=/var/run/wpa_supplicant

network={
 scan_ssid=1
 ssid="MyNetworkSSID"
 psk="MyRouterKey"
}
Assembly
The dummy camera is held together with very small screws that you need a long handled philips or pozidrive screwdriver to undo.
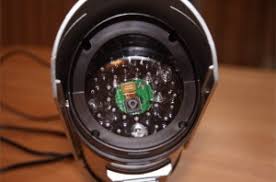
The fake lens is usually held in with hot melt glue and can easily be removed and replaced by the Raspberry Pi’s camera with a bit of hot melt glue.
You may wish to use some black tape to obscure around the lens so that any observer won’t be able to see the PCB attached to the fake LEDs.
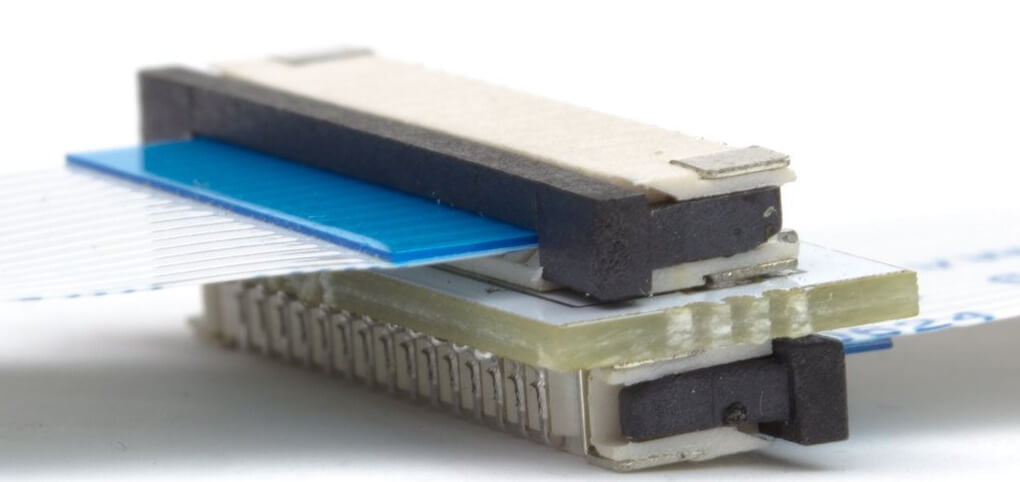
Attaching the camera module
Once you have hot glued the camera to the dummy camera mount you can connect it to the Pi. There is a small dark plastic tab that has to be pulled forwards and lifted to enable the cable to be pushed into the Pi, making sure the copper side is down.
Starting up the Raspberry Pi
Providing the wpa_supplicant.conf file is in the right place and looks something like the above code, the Raspberry Pi will start up and attempt to connect to the Wifi network.
Download Angry IP Scanner to scan your network, the Raspberry Pi should appear with MEYE at the start of the Raspberry Pi. When you find the IP address, enter this into your web browser and you will get a login page. The login is admin without a password, so it is advisable to set a new password.
Configuring your Pi CCTV camera
MotionEyeOS has a lot of features built into the software:
- Turn off the LED – An intruder can look for the tell-tale CCTV LED and know that you have a camera they can avoid. Having an LED that makes a dummy camera look vaguely real can also force the intruder to look for a weakness.
- Support multiple cameras at once. Some small computers, like the Raspberry Pi 4 can work with more than one USB camera, which means you can have several connected to the Raspberry Pi. Salvaged cameras from old laptops are USB, so you can use those internally as they are very small and simple to attach. See this video for details.
- Motion detection reduces the need to record a lot of footage, you can configure email notification.
- Action Buttons – These are buttons that appear at the top of the camera frame on the web page and can be configured to trigger different events that could be connected via the GPIO connector on the Raspberry Pi, such as a light switch if the light levels are getting too low; alarm button that sets off the intruder alarm to scare the intruder off or out of the property; up/down/left/right to control an optional Pan/Tilt module that allows you to control how the camera behaves; zoom in/out depending on whether the camera lens supports a zoom lens.
- Photo and video gallery, so you can preview and download a photo or video that has been captured by the camera.
- How long to preserve video and photos to save space on the memory card.
- Resolution adjustment – Larger resolution means clearer images but less time to store them.
- Store to SD card, USB drive, local Windows share and native support for Google Drive and Dropbox, so files can be stored remotely so even if the intruder damages the camera, the footage is accessible on the Cloud.
- There are new features added to every build of the software.
Putting it all together
If you have invested in the dummy CCTV camera housing and plan to place this camera outdoors, make sure you seal the joints and around the cable outlet with silicone sealant as water ingress is fatal for the electronic components.
The camera works best with natural light, so it will work in tandem with security lights. If you buy the NoIR camera module, the colours will appear pinker during the day but the camera works better in low light conditions and best with an IR floodlight.
Multiple cameras
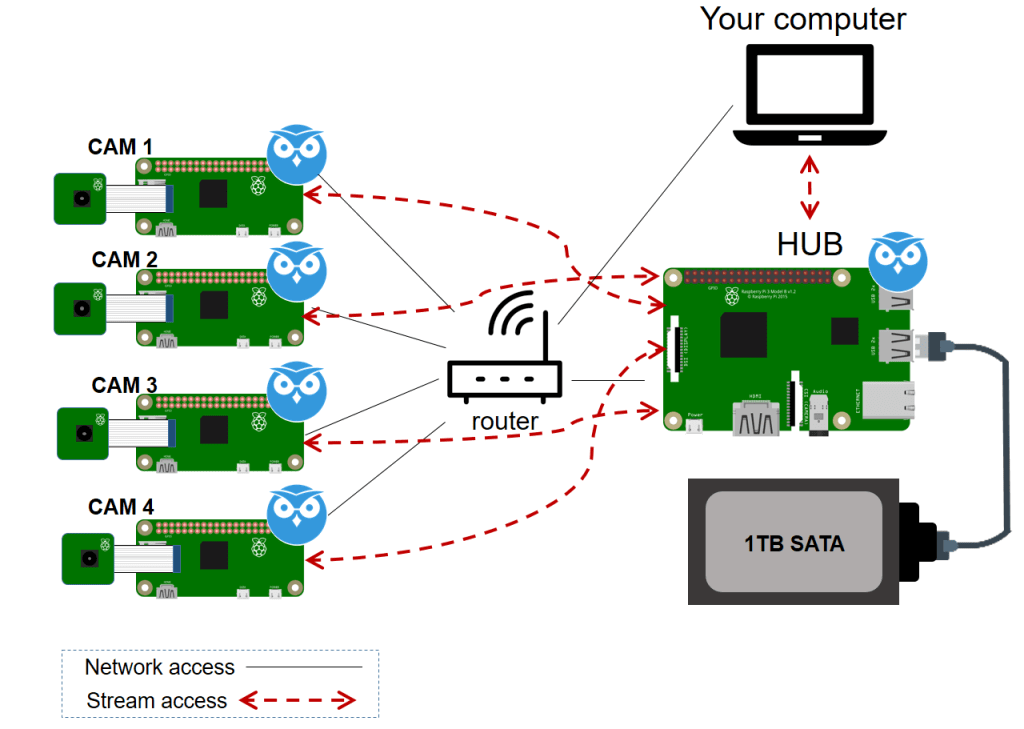
You can easily use more than one camera with the MotionEyeOS as the software supports more than one camera connected using USB, however the Raspberry Pi Zero doesn’t have the processing power for more than one camera.
The best setup is to implement a Raspberry Pi for each camera and then a central Raspberry Pi that serves as the NVR (Network Video Recorder)
Conclusion
There may be lots of steps to build your own CCTV camera, but its like Lego or Mecanno, you just read the instructions and before you know it, you have a working CCTV camera that you can tinker with the settings.
MotionEyeOS gives you a professional installation for free. If you want to do more with your video, you can play around with OpenCV (Computer Vision) and have the camera recognise your car coming down the drive to open the garage doors automatically or announce your guests before they ring the bell.
The Raspberry Pi is a hobbyists dream.
