

During the lock down, there has been panic buying of webcams because everyone needs to see each other over video conferencing.
Amazon have sold out of their really cheap webcams and the more expensive ones are in the £150 mark.
However, there are a lot of old and broken laptops that have a camera in the frame. Typically, any laptop made from the era of Windows 7 has a webcam. All these webcams work on USB. If you don’t have a broken laptop, you can buy these from eBay
You will also need a soldering iron, some basic tools and a multimeter to identify the wires as well as a USB cable you no longer need. An old USB printer cable is probably the best choice.
If you don’t want to make a webcam, you can use a Raspberry Pi and a CSI camera. At the bottom of the page, I have links that show you what to do.
Make your own webcam
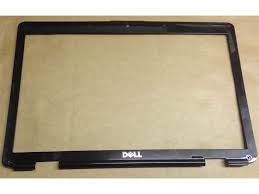
Remove the bezel
The bezel is the frame of the laptop’s screen. These are made of plastic in all but the most expensive of laptops (Apple uses aluminium)
They are sometimes held in with screws covered with rubber or plastic to hide them, although modern laptops use plastic clips. You either remove screws or unclip around the bezel to remove it.
Remove the screen
Screens are held in by screws, usually 4 screws attach the screen to the plastic behind. We don’t need the screen, just the plastic so the metal frame and screen can be folded down.
Remove the camera and wires
The camera is the tiny board on top of the screen, we need the wires that go with it to find out which ones are power vs data from the USB.
Dismantle an old USB printer cable
You need a cable with a square end, and USB printer cables work best for this.
- +5V red wire
- data – white wire
- data + green wire
- 0V ground black wire
Identify the camera wires
You need the wires to identify which wires are which with the help of a multimeter since every camera manufacturer uses a different wiring.
You will see that the USB data cables will be twisted together which is why you want the wires attached to solder to.
Push one of the multimeter probes into one of the pads near a screw hole and test each wire until you see the multimeter identifies a short circuit to find the ground wire.
Next, you need to find out which of them is the power wire. You do this by attaching a probe to the wire and then probing the legs of a chip on the board that has two legs on one side and one on the other (called a power regulator)
The other wires may form the microphone connections if supported, but can be safely ignored.
Once you have identified your wires, solder the ground and power wires to the corresponding wires and twist the corresponding data pairs together. Connect the USB plug into your computer and if you get USB not recognised, you need to swap these round. Once everything is happy, solder these wires together and use heat shrink tubing to keep them protected from each other.
Attaching the camera
You can attach the camera using blue tack, or if you want a more practical solution, you can use sugru, which is a mould-able rubber that sets over time, so you can create something you can place and remove as many times as you feel.
Matt from DIY Perks demonstrates how to turn these cameras into security cameras for the home, but we will be using them for the purpose of a webcam. Pretty much the same process.
Using a CSI camera and Raspberry Pi as a webcam
The CSI (Camera Serial Interface) camera is a module that connects to a Raspberry Pi using a ribbon cable.
The Raspberry Pi Zero W is probably the cheapest option to start with at £9.80 and the camera obtained from Amazon for about £10 (the official ZeroCam is £15) and you will also need at least an 8GB microSD card (about £5 on Amazon) to write the operating system to.
We will be using the Raspberry Pi in what is called “headless mode” where it doesn’t use a screen.
Follow this guide to set up the wireless part of the Raspberry Pi Zero W.
Once the wireless part is working and you can connect to it, follow this guide to set up the camera and install motion detection. The guide will also explain installing some Windows software called SplitCam that fools Windows into believing that you have a webcam on your computer.
Using the Pi Zero W as a security camera
Once the lock down is over, you can reuse the camera setup as a security camera by replacing the operating system on the card with a this guide I wrote back in August.
Splitcam
It’s worth mentioning Splitcam which is a free program for Windows and Mac that allows you to do impressive things with your camera, like use the camera for more than one application at a time; stream content from other sources such as screencasts, video and even have multiple presenters on the same connection using different webcams.
